
Cinnamon Raisin Sourdough Bread
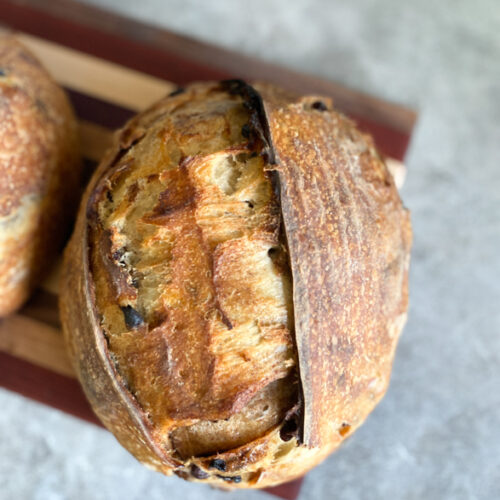
Finally, a cinnamon raisin sourdough bread recipe that isn’t overly complicated! This rustic cinnamon raisin sourdough loaf is lightly sweetened and perfectly speckled with plump raisins. It’s a favorite in our house.

This is my second-most requested sourdough flavor, next to jalapeño cheddar sourdough bread, of course. If you’re looking for an extra special bread to serve for breakfast (it makes out-of-this-world french toast) or a snack, look no further! This easy recipe includes a delectable cinnamon and brown sugar swirl that adds extra flavor and beauty to your loaf.
It’s hard to describe the depth of flavor that sourdough starter adds to this loaf. You’ll just have to try it for yourself. My kids can never wait to slather some cinnamon honey butter on this straight out of the oven. And let’s be honest, neither can I.

This post contains affiliate links, which means I may make a small commission at no extra cost to you. See my full disclosure here.
ingredients list
- Unbleached all purpose flour: I prefer organic. Thrive Market is another favorite for buying organic flour for cheaper-than-grocery-store prices. Bonus, they also sell nutrient-dense einkorn flour, which I use in tons of recipes like einkorn brownies and sourdough einkorn waffles. But for this recipe, all purpose flour works best. It’s readily available, and inexpensive.
- Bread flour: I use a blend of both all purpose and bread flour. However, you can substitute one or the other. If you use exclusively all purpose, you may want to decrease the water by about 50g to make the bread dough easier to work with.
- Active sourdough starter: The mature sourdough starter (or levain) you use in your dough should be active and bubbly. If you need extra guidance on how to tell if you starter is ready, check out this post on performing the float test. You can grab some of mine if you still need to get your own sourdough starter!
- Water: I use tap water with no problem, but use filtered if you feel you need to.
- Sea salt: Any fine grain salt will work.
- Cane sugar: I prefer organic but any granulated sugar will work.
- Ground cinnamon: You’ll add this during the stretch and fold process, as well as in the swirl if you decide to include it.
- Raisins: Sweet raisins are soaked for extra plumpness and give that pop of flavor we love!
- Brown sugar or coconut sugar (optional): I like to use organic brown sugar for the cinnamon swirl, for color and depth of flavor.
sample baker’s schedules
If sourdough planning isn’t your strong suit, be sure to check out the Sourdough Rhythm Planner in my shop. (You can use it over and over!)
I’m including some sample timelines, to make things a little easier. Just remember that sourdough is actually very forgiving, and if you miss a round of stretch and folds or forget about your bread dough for a little while, everything will be a-ok.
Timeline Option 1
The overnight rise works better in cooler temps. Be cautious using this method in the summertime if your kitchen stays warm, because the dough could overproof and turn out flat.
Day 1:
- 1PM: Feed starter
- 7PM: Mix dough
- 7:30PM: Stretch and fold round 1
- 7:45PM: Add jalapeños and cheese and do stretch and fold round 2
- 8PM: Stretch and fold round 3
- 8:30PM: Stretch and fold round 4
- 9PM: Stretch and fold round 5
Overnight:
- 9PM-7AM: Cover and bulk ferment (let the dough rise) on counter until the next morning
Day 2:
- 7AM: Divide and shape loaves to put in floured baskets/bowls in the fridge
- 5PM: Bake or wait until the next day! You can even wait up to 3 days to bake, whenever you’re ready for fresh bread.
Sample Timeline 2
This timeline works better in warmer kitchens, when bulk fermentation takes less time.
Day 1:
- 8:30AM: Feed starter
- 1:30ish PM: Mix dough
- 2PM: Stretch and fold round 1
- 2:20PM: Add jalapeños and cheese and do stretch and fold round 2
- 2:40PM: Stretch and fold round 3
- 3PM: Stretch and fold round 4
- 3:30PM: Stretch and fold round 5
- 3:30-9:30PM: Bulk ferment
- 9:30PM: Shape and place in floured baskets/bowls. Cold ferment in fridge overnight or up to 3 days.
Day 2, 3, 4: Bake when you’re ready!

how to make sourdough cinnamon raisin bread
Don’t let the steps intimidate you! Making cinnamon raisin sourdough is really rewarding, fun, and even simple, once you get the hang of it.
I like to start by soaking my raisins in warm water so they’re extra soft. I do this very first thing, so by the time they need to be strained and added to the dough, they’ve already been soaking for 45 minutes to an hour. But this is an optional step.

Step 1: Mix and perform stretch and folds
Start by adding active starter, flours, water, cane sugar, and salt to a large mixing bowl or the bowl of a stand mixer.

No stand mixer? No problem. You can do this with your hands. Mix the dough ingredients on low speed (I use the dough hook attachment) until it comes together and forms a shaggy dough.
Cover the bowl with a tea towel and let rest for about 30 minutes, then perform the first set of stretch and folds. If you aren’t sure what stretch and folds are, imagine grabbing the dough at the edge of the bowl and gently pulling up and out. Do this once and then turn the bowl a quarter turn and repeat 3 more times. This completes a full set of stretch and folds.
After another 20 minutes, add soaked raisins and cinnamon, then complete another set of stretch and folds.

Repeat stretch and folds every 20 minutes(ish) until the dough passes the windowpane test (for me this usually takes 4-5 sets). I like to manipulate the raisins a little bit as I do stretch and folds to get them more evenly dispersed, but a few sets of stretch and folds should do the trick.

Step 2: Bulk ferment
Once the dough is elastic and pliable, cover the bowl with plastic wrap or a tight fitting lid and bulk ferment until doubled. This first rise process could take anywhere from 6-12 hours, depending on the season and temperature of your kitchen. Just keep an eye on your dough and try not to overthink it too much.
Step 3: Add swirl and shape
If you’re trying to keep things as simple as possible, feel free to skip this step. But it really isn’t hard, and it makes the loaf look that much prettier once you cut into it!
Once the dough has doubled, turn it out onto the counter or another flat, clean work surface. Smack it on the counter a couple times for good measure (this continues to develop structure in the dough). Next, spread the dough into a rectangle-ish shape, like so:

Sprinkle 1/4 cup of brown sugar and 1 tbsp of cinnamon over the dough. Roll the dough up from the bottom (as if you were making sourdough cinnamon rolls).

Then, roll in the left and right sides to meet each other. Like this:

Flip the ball of dough over and start gently pulling it towards you along the counter. Wet hands help a lot if your dough is sticky.
If you pull the dough straight toward you without rotation, you will end up with an oval (boule) shape. If you’d prefer a circular (batard) shape, then rotate the dough diagonally across the counter as you pull it along.
There are multiple ways to shape sourdough — if it seems a little confusing, don’t worry too much. Just keep practicing and experimenting with different methods. The more you do it, the easier it will become and the better your loaves will turn out!

Step 4: Cold proof
After shaping, place the dough into a prepared banneton basket or bowl. I always use a liner for whatever vessel I’m using. Sometimes that means a leftover plastic deli meat container lined with a cut-up old t-shirt. Hey, no one said making sourdough always has to be aesthetic.
Let the shaped dough rest in the fridge for a cold ferment. Cold proofing is technically optional, but I highly recommend it. It will add flavor, make the dough easier to score, and give your final loaf a tighter crust.
The shaped loaf can stay in the fridge anywhere from 8-36 hours, depending on when you want your bread and how sour you like it.
Step 5: Bake
When it’s time to bake, preheat your oven with dutch oven inside to 450F. Preheating my dutch oven for at least 30 minutes gives me the best results.
Take the dough out of the fridge and turn it onto a piece of parchment paper. Dust the top with flour if you wish, and score a simple scoring pattern on the top of the dough.
I always put a single layer of rice in my dutch oven, then place the bottom of the dough (on parchment paper or a silicone bread sling) over top of that. This trick has changed the game for me when it comes to baking sourdough at such a high temperature, and prevents any burnt bottoms!
Once the dough has been lowered inside the dutch oven, put the lid on and bake at 450F for 35 minutes. Then remove the lid and bake for another 10-15 minutes or until golden brown and the internal temperature is at least 195F.
The amount of time you bake with lid off vs. lid on really depends on the level of browning you like on your bread. I have found that loaves with inclusions like dairy or sugar typically brown more quickly, so keep that in mind as you work to achieve your desired crust.
Let the loaf cool on a wire rack or cutting board for at least 1 hour before slicing into it, if you can.

More sourdough help
Do you feel like you could use some extra hand holding through this process?
I have good news for you! I have a comprehensive sourdough course, Honest Sourdough, if you’re ready to dive in head first and become a sourdough master.
Taking the self-paced course will guide you through:
- How to activate a dehydrated sourdough starter (that I send you for free!)
- The basics of starter care and how to know it’s ready for baking
- How to properly mix, proof, and bake sourdough breads
- Hacks for fitting sourdough into any schedule
- Bonus workshops walking you through sourdough sandwich bread and sourdough cinnamon rolls

how to store and freeze cinnamon raisin sourdough bread
I have an entire post on how to store sourdough bread and keep it fresh. Cinnamon raisin sourdough bread will keep in a covered container or plastic bag for at least 5-7 days. I don’t recommend storing in the fridge, as it dries out the bread.
This cinnamon raisin bread freezes beautifully. You can pre-slice if you want, then freeze in a plastic freezer bag for up to 3 months.
To refresh frozen bread, thaw it at room temperature for a few hours. Then, wrap it in aluminum foil and bake at 350°F for 10-15 minutes.
By following these simple tips, you can enjoy your sourdough bread for longer and avoid wasting any of it!

Cinnamon Raisin Sourdough Bread
Ingredients
- 100 g starter about 1 cup
- 250 g bread flour about 1 3/4 cups
- 250 g all purpose flour about 1 3/4 cups
- 330 g water 1 1/2 cups
- 15 g salt about 2 tsp
- 75 g cane sugar about 1/3 cup
- 80 g raisins about 1/2 cup
- 2 tbsp cinnamon divided
- 1/4 cup brown sugar
Instructions
- OPTIONAL: Prepare raisins by soaking in warm water for at least 45 minutes.
Mixing and Stretching
- Add active starter, flours, water, cane sugar, and salt to a large mixing bowl or the bowl of a stand mixer.
- Mix using your hands or the dough hook until a shaggy dough forms.
- Cover the bowl with a tea towel and let rest for about 30 minutes, then perform the first set of stretch and folds. If you aren’t sure what stretch and folds are, imagine grabbing the dough at the edge of the bowl and gently pulling up and out. Do this once and then turn the bowl a quarter turn and repeat 3 more times. This completes a full set of stretch and folds.
- After another 20 minutes, add soaked raisins (don't forget to drain them first) and 1 tbsp cinnamon, then complete another set of stretch and folds.
- Repeat stretch and folds every 20 minutes until the dough passes the windowpane test (for me this usually takes 4-5 sets).
Rise/Bulk Ferment
- Once the dough is elastic and pliable, cover the bowl with plastic wrap or a tight fitting lid and bulk ferment until doubled. This first rise process could take anywhere from 6-12 hours, depending on the season and temperature of your kitchen. Just keep an eye on your dough and try not to overthink it too much.
Add Swirl and Shape
- Once the dough has doubled, turn it out onto the counter or another flat, clean work surface. Smack it on the counter a couple times for good measure (this continues to develop structure in the dough).
- Spread the dough into a rectangle. Sprinkle 1/4 cup of brown sugar and 1 tbsp of cinnamon over the dough.
- Roll the dough up from the bottom. Use a bench scraper if needed. Then, roll in the left and right sides to meet each other.
- Flip the ball of dough over and start gently pulling it towards you along the counter. Wet hands help a lot if your dough is sticky.
- If you pull the dough straight toward you without rotation, you will end up with an oval (boule) shape. If you’d prefer a circular (batard) shape, then rotate the dough diagonally across the counter as you pull it along.
Cold Proofing
- After shaping, place the dough into a lined banneton basket or bowl.
- Let the shaped dough rest in the fridge for a cold ferment. Cold proofing is technically optional, but I highly recommend it. It will add flavor, make the dough easier to score, and give your final loaf a tighter crust.
- Place the shaped loaf in the fridge for anywhere between 8-36 hours. Leaving the dough longer will deepen the sourdough flavor.
Baking
- Preheat your oven with dutch oven inside to 450F. For best results, preheat oven for at least 30 minutes.
- Take the dough out of the fridge and turn it onto a piece of parchment paper or sling. Dust the top with flour if you wish, and score the top of the dough. Lower the dough inside the dutch oven.
- Put the lid on and bake for 35 minutes. Then remove the lid and bake for another 10-15 minutes or until golden brown and the internal temperature is at least 195F.
- Let the loaf cool on a wire rack or cutting board for at least 1 hour before slicing into it, if you can!

![Sourdough Einkorn Scones [With Apples + Cinnamon]](https://growingdawn.com/wp-content/uploads/2024/08/applesourdoughscones-08.jpg)


Thanks for stopping by, friends! If you try this recipe, be sure to rate and leave a comment!