
Rustic Sourdough Bread Recipe
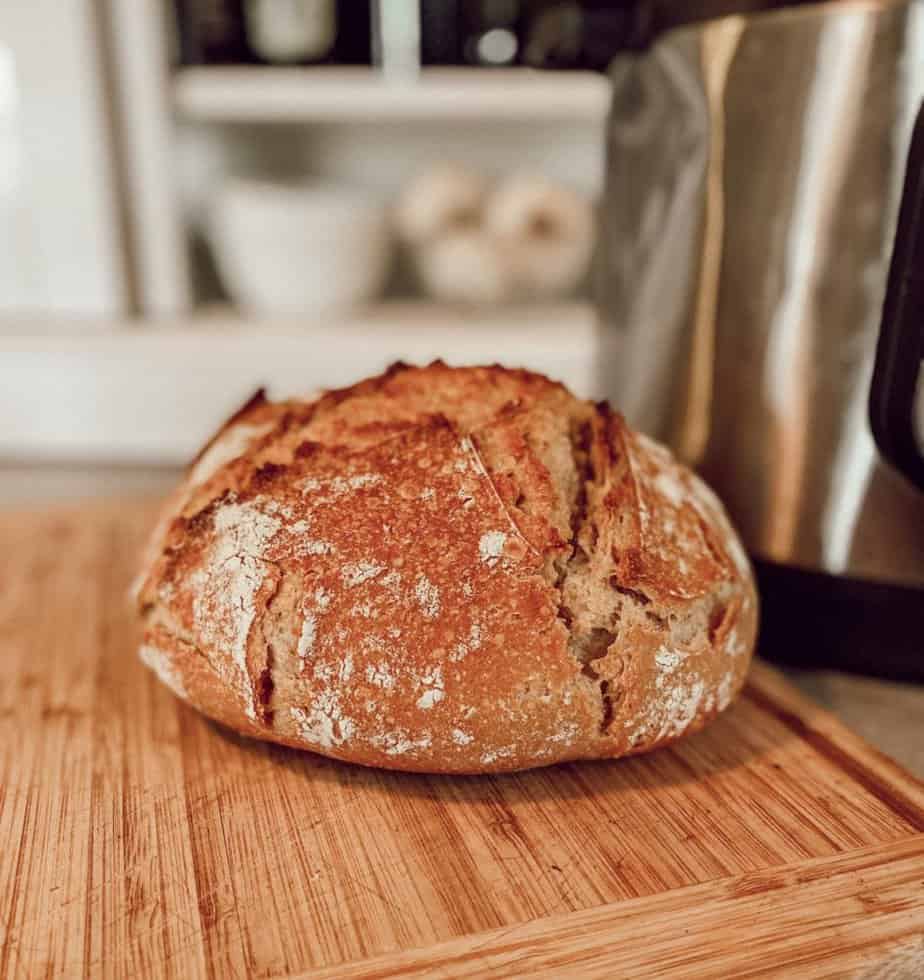
Maybe you’ve just gotten your first bubbly sourdough starter and you want to know how to make delicious, crusty sourdough bread. Trust me when I say, this rustic sourdough bread recipe is exactly what you need. I’ve had some requests for my sourdough recipe over on Instagram, and it’s time for me to finally share it here! The best part is, this recipe is super easy and forgiving. Sourdough does not have to be complicated, my friends.
When I first got started with sourdough, I was intimidated by the thought of actually making bread with it. So for a while, I stuck with quick recipes like pancakes, flatbread, muffins, and such. I still love making those kinds of recipes, but none of that gives me quite the same satisfaction as baking a beautiful loaf of bread.
While softer sandwich loaves typically include ingredients like olive oil or milk, this rustic bread has only 4 simple ingredients. It’s the perfect loaf to start practice your sourdough baking skills.

This post contains affiliate links, which means I may make a small commission at no extra cost to you. See my full disclosure here.
Rustic Sourdough Bread Recipe Index
Since this post is a bit long, here is an index so you can jump to the sections you want to see:
I. Sourdough Starter vs. Yeast
II. Getting Sourdough Starter Ready for Bread Baking
III. Useful Tools for Sourdough Making
IV. Stand Mixer Method (Sample Timeline)
V. Stretch-and-Fold Method (Sample Timeline)
VI. Shaping Rustic Sourdough Bread
VII. Baking in a Dutch Oven
VIII. Common Questions for Rustic Sourdough Bread
IX. Final Tips for Baking Rustic Sourdough Bread
Sourdough Starter vs. Yeast
You may be wondering what the differences are between sourdough and traditional yeast bread. I am certainly no science expert, but I have reason to believe that there are additional health benefits to baking with sourdough.
Active sourdough starter is yeast, activated by the feeding process and wild yeast found in the air. So the way that sourdough starter and commercial yeast works is essentially the same. However, there are some differences as to how the yeast is produced.
Store-bought yeast is continually sterilized to create a dry product that stores for long periods of time. So naturally, it undergoes more processing. I always prefer to use ingredients that are processed as little as possible. Because I make and nurture my sourdough starter in my own kitchen, I’m confident that it is full of beneficial bacteria that improves our gut flora. I also like that I can produce starter myself (as long as I have plenty of flour on hand) without having to rely on buying another ingredient from the store.
The fermentation process that sourdough goes through as it rises gives it a distinct, sour flavor. It also makes the bread healthier. This is because it breaks down the phytic acid in the wheat, making it easier to digest.
Getting Sourdough Starter Ready For Bread Making
If you have a sourdough starter, you must make sure that the starter is bubbly and active before making bread with it. If the starter is flat (in the “discard” stage), then it means the yeast is not active. No yeast means no rise to your bread.
I have a few tricks up my sleeve to help you get your starter to peak activity, and how to know when it’s ready:
- Feed your starter consistently (every 12-24 hours) for a few days before baking bread with it.
- Always feed at least an amount equal to the starter you have on hand. This means that if you have about 1 cup of starter, stir in at least 1 cup of water and 1 cup of flour per feeding. (And remember, if you end up with excess starter after going through this process, you can always make the recipes in my Sourdough Discard Favorites ebook!)
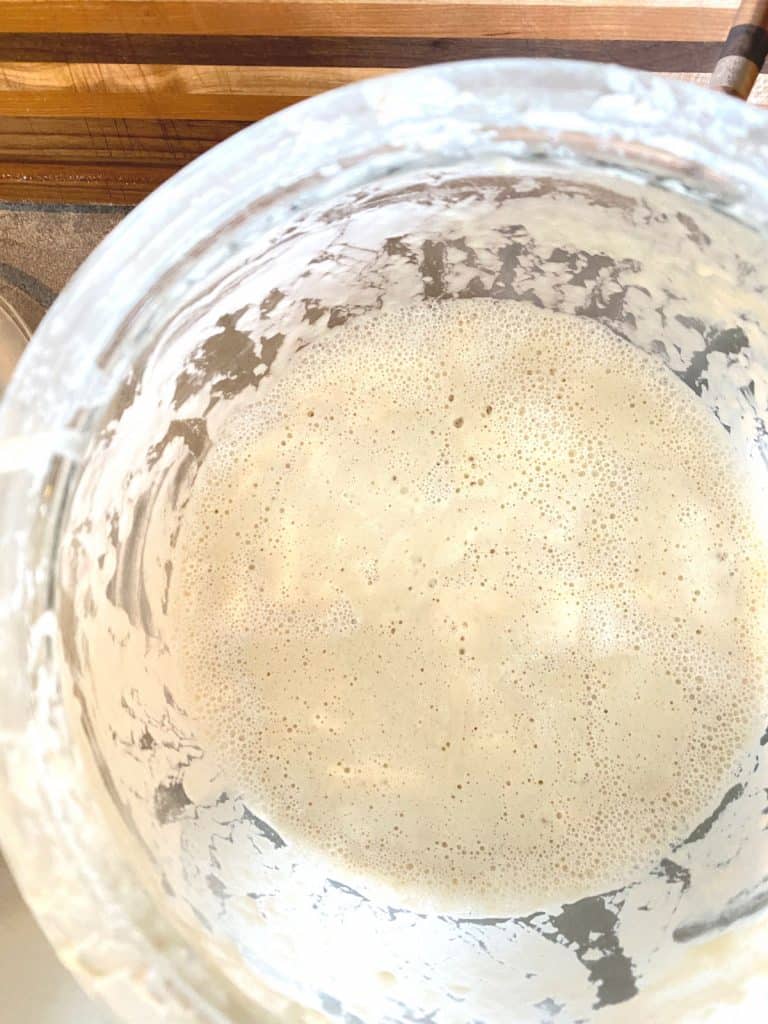
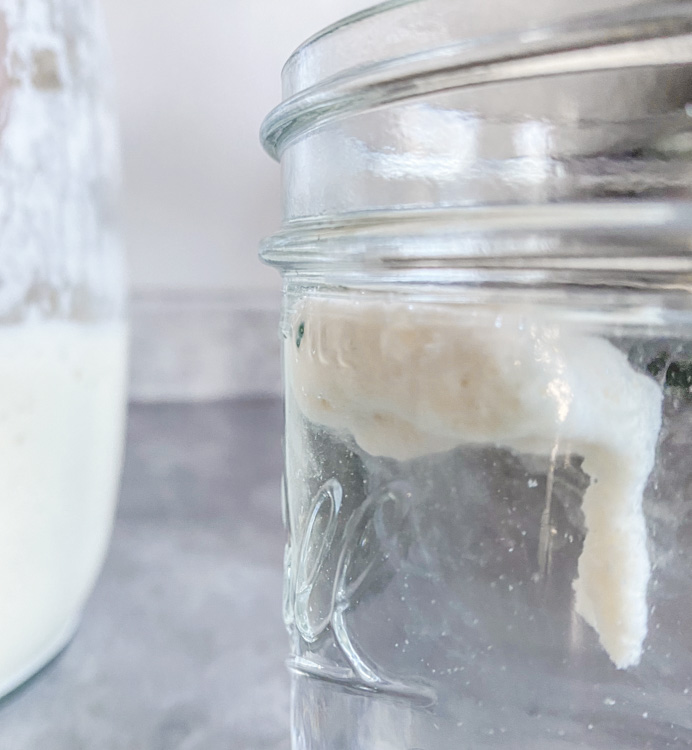
- Keep an eye on your starter 4-8 hours after feeding. This is when I find mine is the most active. Make sure you see lots of bubbles. You can test your active starter by dropping a tablespoon in a glass of water and seeing if it floats. If it floats to the top of the glass, it’s ready for bread making!
This is what my starter looks like in the jar when it’s active:
Tools Needed To Make Sourdough Bread
There are a few tools that make this rustic sourdough bread recipe easier to do, although they aren’t required. I like using a stand mixer because it saves me a ton of time. I will never hand-knead my bread for 15 minutes straight or however long people say to do it. Trust me when I say there really is no need to do that.
I have a busy life and hand kneading is not the journey for me. I’m guessing it may not be for you either. So, if you don’t have a stand mixer and still want to make bread without hand kneading, I’m going to share a method called stretching and folding that eliminates the need to knead. (See what I did there?)
Other things that I use all the time when making sourdough bread are banneton baskets, a bench scraper, and a thermometer. You could just use random baskets you have sitting around your house, if they hold roughly the same volume of dough. I also have used bowls when I have to make a lot of loaves at once.
A bench scraper comes in handy for scraping dough out of bowls, dividing dough into multiple loaves, and scraping the counter when shaping.
A candy or meat thermometer has become a must for me. I would sometimes find that my bread wasn’t baked all the way in the middle for whatever reason. And that’s no bueno.
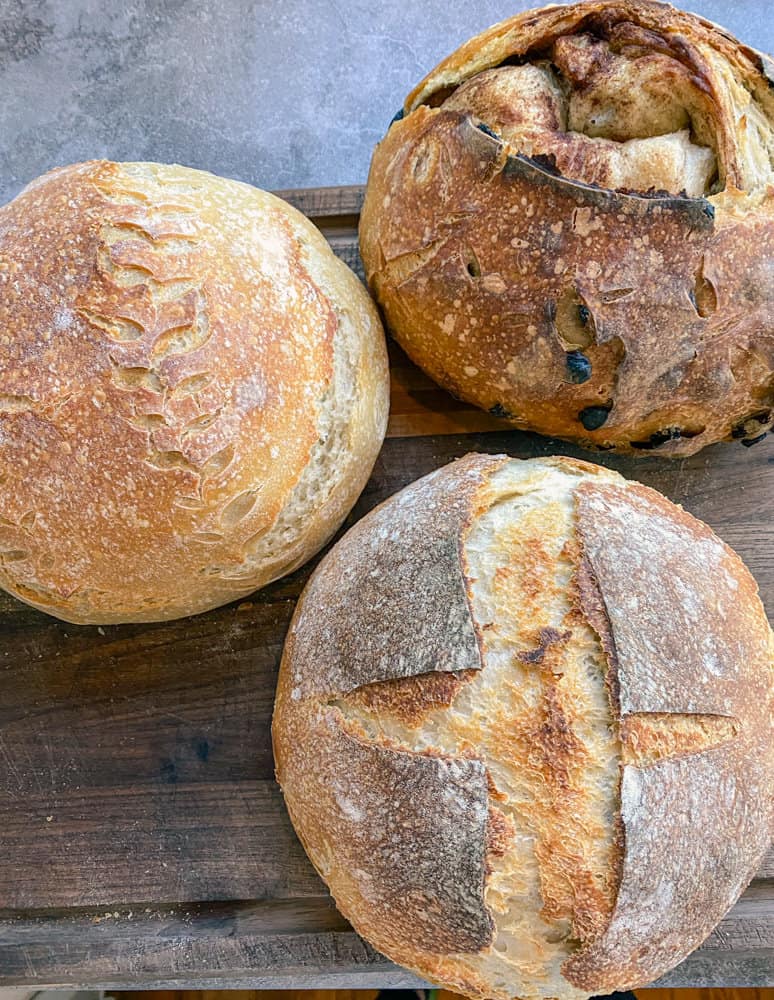
If you want to learn how to make ultra intricate designs for pretty bread, you will want a scoring razor. But I’ve been baking with sourdough on a weekly basis for a year now, and have never used one. I actually like the rustic look of a simple crosshatch or something similar (which I do with a sharp filet knife).
A nice, sharp knife also comes in really handy for cutting crusty sourdough bread. My husband finally bought me this knife after I had been baking sourdough for a while, and I’m not sure how I survived without it for so long!
Stand Mixer Method for Rustic Sourdough Bread Recipe
Even the stand mixer method can be made complicated or simple. There is a process called autolyse that can help with gluten development if you want to try it. It’s basically letting your flour, water, and starter sit in the bowl for about 30 minutes before adding salt and kneading. I have done this, but usually I don’t take the time and I don’t notice a huge difference.
For the very simplest (and still effective) method: dump in all of your ingredients, set the mixer to the lowest speed and let the dough hook do its job for about 10 minutes.
After the dough has been kneaded sufficiently, cover the bowl with plastic wrap or a lid and let it bulk ferment for 6-12 hours. Divide and shape the loaves and put them in the fridge to proof more.
Refrigerator time is sometimes called the “cold retard” or second rise. But the dough doesn’t actually rise much during this process. It is mostly done to deepen the sourdough flavor, and help give better oven spring. If you’re in a rush, you certainly can go ahead and bake your bread from room temperature after dividing and shaping.
To make this process easier to understand and plan for, here is a sample timeline that I use regularly when going the stand mixer route.

Sourdough Bread Sample Timeline 1:
Day 1:
- 2PM: Feed starter
- 8PM: Make dough in stand mixer (starter is active at this time)
Overnight:
- 9PM-9AM: Cover and bulk ferment (let the dough rise) on counter
Day 2:
- 9AM: Divide and shape loaves to put in floured baskets/bowls in the fridge
- 5PM: Bread is ready to bake for supper, or you can keep it in the fridge longer for whenever you need it (up to 3-4 days)
Stretch and Fold Method for Rustic Sourdough Bread
Sometimes if I feed my starter early in the morning or I don’t feel like using my stand mixer for whatever reason, I will use the stretch and fold method.
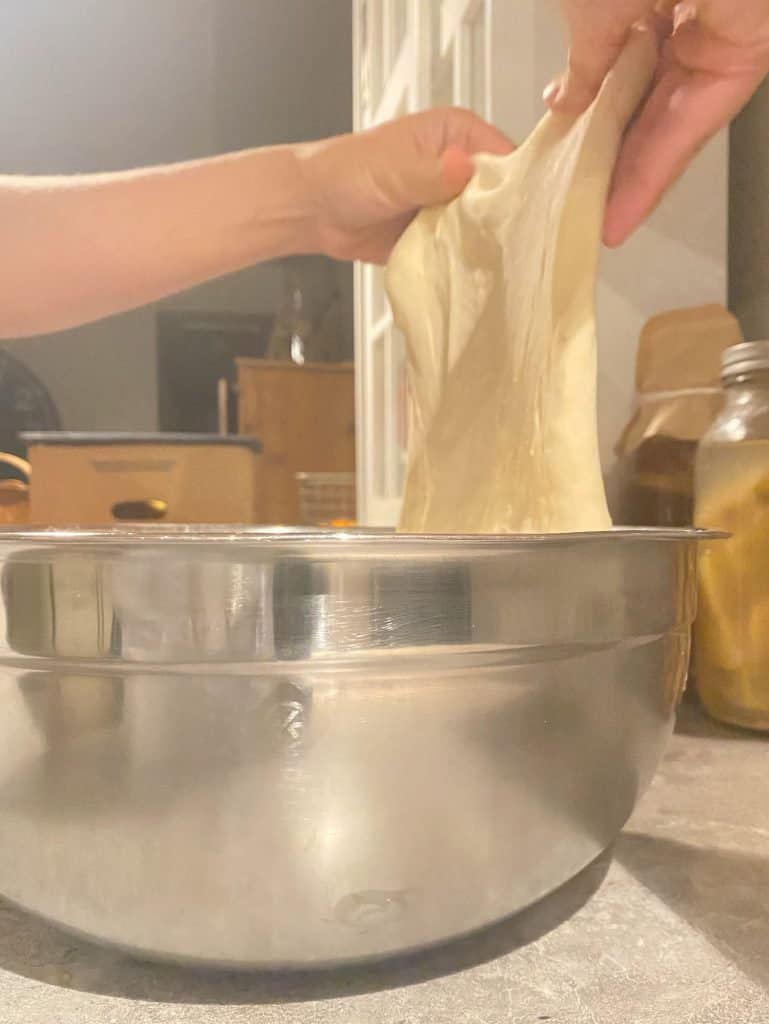
Stretching and folding is just what it sounds like. You take your dough and pull it up and out. Then, you fold it over onto itself. Spacing out your stretch and folds and letting the dough rest develops the gluten, making a dough that’s softer and easier to handle.
When I use the stretch and fold method, I usually mix my ingredients by hand in a large bowl. Once the ingredients are pulled together into a shaggy dough, I cover it with a clean, damp tea towel and let it sit for 20-30 minutes. Then, I begin my series of stretch and folds.
How to Stretch and Fold Rustic Sourdough Bread
Each time you go to stretch and fold, you go around the bowl and stretch the dough/fold it over at least 4 times. Think of it as covering four corners. To do this process, grab the edge of the dough and firmly pull up as far as you can without the dough breaking, then fold it over. Turn the bowl a quarter turn and repeat. Once you’ve gone around the bowl, you’ve completed 1 set of stretch and folds. Be sure to cover it back up with a kitchen towel in between sets.
I like to do a set of stretch and folds about 6 times. If I can, I do the first 3 rounds every 15 minutes, and the last 3 every 30 minutes. Now, please hear me me out before you start worrying about timing…
Some people time their stretch and folds down to a science, but like hand-kneading, exact timing is equally not the journey for me. I’m a mom of four, and sometimes the toddler dumps water on the floor, or someone needs help with math, or whatever. I can’t always get to my dough in 15 minutes exactly, and that is okay. Sometimes if I’m short on time, I even skip a couple of rounds of stretching and folding. I still make pretty darn good sourdough bread, which means you can, too!
Sourdough Bread Sample Timeline 2:
Day 1:
- 8:30AM: Feed starter
- 1:30ish PM: Mix dough
- 2PM: Stretch and fold round 1
- 2:15PM: Stretch and fold round 2
- 2:30PM: Stretch and fold round 3
- 3PM: Stretch and fold round 4
- 3:30PM: Stretch and fold round 5
- 4PM: Stretch and fold round 6
- 4-10PM: Bulk ferment
- 10PM: Divide and shape, place in floured baskets/bowls and leave in fridge overnight or up to 4 days
Day 2, 3, 4: Bake when you’re ready!
Starting earlier gets the entire mixing, rising, and shaping process out of the way in 1 day.
Shaping Rustic Sourdough Bread
After the dough has bulk fermented, use a bench scraper to turn it out onto a lightly floured work surface. Divide the dough into 2 equal parts. Take one corner of the dough at a time and fold it into itself. After doing this on four equal sides, turn the dough over so the folds are on the bottom. Roll it around with your hands using a clockwise motion, tucking more of it under as needed. Once it’s shaped, place it face down in a floured proofing basket or bowl.
Baking Sourdough Bread in a Dutch Oven
A dutch oven is important when baking rustic loaves like this recipe. I suppose you could also use an oven safe glass bowl (like Pyrex) and cover it with foil during the first half of baking, if that’s all you have. Pyrex is only oven safe up to 425°, so baking times would change slightly. You can also open bake on a stone or cooking steel like this one I have (and love!).
Preheat your oven to 475° before baking. I usually go ahead and preheat my dutch oven inside, although I’ve also not done it and still gotten good results.
When you pull your dough out of the fridge (or right after shaping if you’re in a hurry), transfer it from the proofing basket onto a piece of parchment paper. The top of the dough is actually on the bottom of the bowl or basket as it proofs. The side that was facing up in the basket or bowl will now be facing down on the counter. Choose a simple sourdough scoring pattern and score it on the top with a lame or sharp knife. Carefully lower the bread into the hot dutch oven.
Put the lid on, place it in the oven and bake for 30 minutes.
After that, remove the lid and bake for another 20-25 minutes. The internal temperature should be at least 195°F. Carefully take the loaf out of the dutch oven right away to prevent the bottom crust from getting too dark. You can place it on a cooling rack or cutting board. Then, let the loaf cool for at least an hour before slicing. (P.S. this bread knife really has changed my life as a regular sourdough baker. And I have no affiliation in any way.)

Common Questions for Making Rustic Sourdough Bread
What is the best flour for sourdough bread?
Unbleached all purpose flour is preferred for maintaining a sourdough starter, although other kinds will certainly work. When it comes to flour for the dough, a blend of all purpose and bread flour works best. But you can substitute for either one! I have an entire guide about what flours to use for sourdough here on the blog.
How can you reheat rustic sourdough bread?
To reheat a loaf that’s already been baked, wrap it in foil and place in a 350° oven for 20 minutes.
Can you freeze sourdough bread?
Yes. You can freeze a whole loaf or you can pre-slice it, wrap it tightly, and freeze. Frozen slices work great for making quick toast. For a whole loaf, the best way to heat after freezing is to let the loaf thaw on the counter, spritz it all over with water, and place in a very hot oven (around 450°) for 5-10 minutes.

Final Tips for Mixing, Rising, Shaping, and Baking
Here are a few more random tips that may help you in creating your first rustic sourdough bread loaf!
- Sourdough is a more sticky, wet dough than typical bread dough. If your dough is not coming together at all (especially in the stand mixer) then add 1/4 cup of flour at a time until it does. Just know that usually, the dough will come together more during the bulk fermentation.
- Bread flour can be substituted either fully or partially for all purpose flour. Bread flour gives the loaf a chewier texture. If you are using mostly whole wheat flour as opposed to just white flour, you may want to decrease the water in the recipe by 1/3-1/2 cup.
- Keeping the dough in the refrigerator for a long time will help with developing that classic sourdough flavor. I actually prefer the flavor of loaves that have sat in the fridge for 2 or 3 days. But I don’t always have that much patience!
- Dust the top of your loaf with wheat flour, rice flour, or cornmeal before scoring for a design that pops. Also, don’t expect the scoring pattern to look that pretty if you don’t give the loaf time in the fridge first. Something about it being cold really helps!
- Play around with the baking times of the lid being off and on to get the level of darkness that you’re looking for.
- Don’t slice the bread any sooner than 1 hour, or you may end up with a doughy loaf. The middle of the bread will continue to cook as it sits on the counter.

Rustic Sourdough Bread
Ingredients
- 7.5 cups bread flour 1000g, can substitute all-purpose
- 1 cup sourdough starter 200g, active and bubbly
- 3 cups water 670g
- 4 tsp sea salt
Instructions
- OPTIONAL: Combine flour, water, and sourdough stater in large bowl or bowl of stand mixer and let sit for 30 minutes to autolyse (for better gluten development) before adding salt.
- If you're doing the autolyse process, add salt after the 30 minutes is up. If not, combine all your ingredients into a large bowl.
- STRETCH-AND-FOLD METHOD (skip to step 6 if using a stand mixer): Mix with a sturdy wooden spoon or your hands until a shaggy dough is formed. Cover with a clean, damp tea towel and let sit for 20 minutes.
- STRETCH-AND-FOLD METHOD: Complete 1 set of stretch-and-folds by grabbing one edge of the dough and firmly pulling up as far as you can without the dough breaking, then folding it over. Turn the bowl a quarter turn and repeat until you've gone all the way around.
- STRETCH-AND-FOLD METHOD: Repeat step 4 every 15 minutes for 3 rounds. Then repeat every 30 minutes for another 3 rounds. Remember, timing does not have to be perfect (read above) 😉
- STAND MIXER METHOD: Using the dough hook, set the mixer to the lowest speed and knead for 10-15 minutes.
- Cover the bowl with plastic wrap and let dough bulk ferment for 6-12 hours until it has at least doubled in size.
- After rising, use a bench scraper to turn it out onto a lightly floured work surface. Divide the dough into 2 equal parts. Take one corner of the dough at a time and fold it into itself. After doing this on four equal sides, turn the dough over so the folds are on the bottom. Roll it around with your hands using a clockwise motion, tucking more of it under as needed.
- Place shaped dough face down in a proofing basket or bowl. Cover with plastic wrap and put it in the refrigerator for at least 12 hours. Refrigerator time is optional, but recommended!
- To bake, preheat oven with dutch oven inside to 475°. Turn out the dough onto parchment paper and score with a razor or sharp knife (adding a little flour or cornmeal to the top before scoring will help the pattern stand out more). Carefully lower dough into a hot dutch oven, and put the lid on. Bake with the lid on for 25 minutes, then with the lid off for another 25 minutes. The internal temperature of the bread should read at least 195°F right after pulling it out of the oven.
- Carefully remove bread from dutch oven (I just turn it out onto a wooden carving board) and let cool for at least 1 hour before slicing.
Did you try this recipe and like it? Was it your first time baking sourdough bread? I would love for you to give it a 5-star rating and let me know about your experience in the comments below!


Thanks for stopping in, friends! Rate and let me know how you like the recipe if you try it!
Planning to try this but no recioe for the starter is included in these directions. Where can I find your starter recipe?
Thanks
I have a simple how-to in this post:
https://growingdawn.com/why-sourdough-starter-is-amazing/